
Summary: This post is about how to empty Trash on a Mac. Doing this cannot be easier and what you need to do is a simple click. But how about it fails to do this? How do you force the Trash to empty on a Mac? Please scroll down to see the solutions.
Emptying the Trash on a Mac is the easiest task in the world, however, sometimes things could be tricky and you just cannot empty the trash somehow. Why can’t I delete those files from my Mac’s Trash? Here are the common reasons:
- Some files are in use;
- Some files are locked or corrupted and need to be repaired;
- A file is named with a special character that makes your Mac think it’s too important to be deleted;
- Some items in the trash cannot be deleted because of system integrity protection.
So this piece is devoted to discussing what to do when you can’t empty Trash on Mac and how to force empty Trash on Mac fast.
When Your Mac Says That the File is in Use
This is the most common reason why we can not empty the Trash. Sometimes, you think you have closed all apps that are possible using the file while your Mac thinks otherwise. How to fix this dilemma?
Restart your Mac
Firstly, restart your Mac and then try to empty the Trash again. Although you think that you have quit all apps that could be using the file, maybe there is an app with one or more background processes that are still using the file. A restart can terminate the background processes.
Empty the Trash in Safe mode
The Mac will say that the file is in use when the file is used by a startup item or login item. Therefore, you’ll need to start up the Mac in safe mode, which won’t load any third-party hardware drivers or startup programs. To enter safe mode,
- Hold down the Shift key when your Mac boots.
- Release the key when you see the Apple logo with the progress bar.
- Then you can empty the Trash on your Mac and restart your computer to exit safe mode.
![[Solved] Cannot Empty the Trash on Mac](https://www.mobepas.com/images/20220213_620942296ae1b.jpg)
Use Mac Cleaner
If the above methods don’t work, you may want to use the cleaner – MobePas Mac Cleaner to clean the Trash in one click.
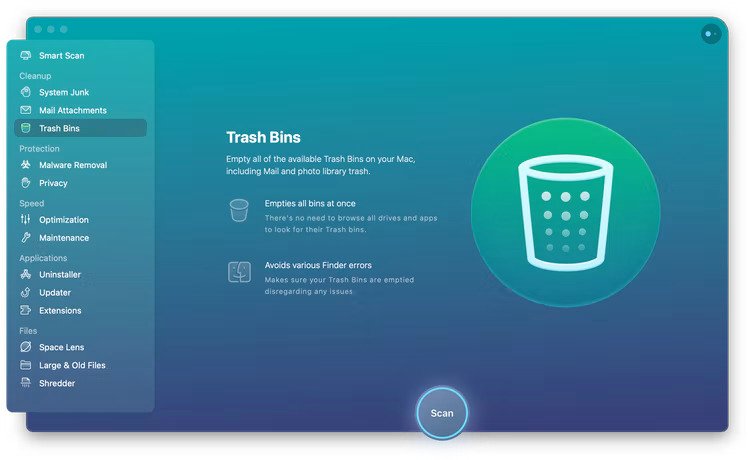
What’s great about using Mac Cleaner is that you can free up more space by performing a whole cleanup on your Mac, clearing cached data, logs, mail/photos junk, unneeded iTunes backups, apps, large and old files, and more. To delete the trash with Mac Cleaner:
- Download and install MobePas Mac Cleaner on your Mac.
- Launch the program and choose the Trash Bin option.
- Click Scan and the program will scan out all junk files on your Mac in seconds.
- Tick certain items and click the Clean button.
- The Trash will be emptied on your Mac.
When You Can’t Empty Trash for Other Reasons
Unlock & Rename A File
If the Mac says that the operation could not be completed because the item is locked. Firstly, make sure the file or folder is not stuck. Then right-click on the file and choose “Get Info.” If the locked option is checked. Uncheck the option and empty the Trash.
![[Solved] Cannot Empty the Trash on Mac](https://www.mobepas.com/images/20220213_6209422a3acb0.jpg)
Also, if the file is named with weird characters, rename the file.
Repair Disk with Disk Utility
If the file is corrupted, you need extra effort to delete it permanently from the Trash.
- Startup your Mac in Recovery mode: hold down the Command + R keys when the Mac starts up;
- When you see the Apple logo with the progress bar, release the keys;
- You will see the macOS utility window, select Disk Utility > Continue;
- Choose the disk that contains the file that you want to delete. Then click First Aid to repair the disk.
![[Solved] Cannot Empty the Trash on Mac](https://www.mobepas.com/images/20220213_6209422a7bde4.jpg)
After the repair is done, quit Disk Utility and restart your Mac. You can empty the Trash now.
When You Cannot Empty Trash Because of System Integrity Protection
System Integrity Protection(SIP), also called the rootless feature, was introduced to Mac in Mac 10.11 to prevent malicious software from modifying protected files and folders on your Mac. To remove files protected by SIP, you need to disable SIP temporarily. To turn off System Integrity Protection in OS X El Capitan or Later:
- Reboot your Mac in Recovery mode by pressing the Command + R keys when the Mac reboots.
- On the macOS Utility window, choose Terminal.
- Enter the command into the terminal:
csrutil disable; reboot. - Hit the Enter button. A message will appear saying that System Integrity Protection has been disabled and the Mac needs to restart. Let the Mac reboot itself automatically.
Now the Mac boots up and empty the Trash. After you have done clearing the Trash, you’re recommended to enable SIP again. You need to put the Mac into Recovery mode again, and this time use the command line: csrutil enable. Then reboot your Mac to make the command take effect.
How to Force Empty Trash on Mac with Terminal on macOS Sierra
Using Terminal to perform command is very effective to force empty the Trash. However, you should follow the steps very carefully, otherwise, it will erase all your data. In Mac OS X, we used to use sudo rm -rf ~/.Trash/ commands to force empty Trash. In macOS Sierra, we need to use the command: sudo rm –R. Now, you can follow the specific steps below to force the trash to empty on a Mac using Terminal:
Step 1. Open Terminal and type: sudo rm –R followed by a space. DO NOT leave out the space. And DO NOT hit Enter in this step.
Step 2. Open Trash from the Dock, and select all the files and folders from the Trash. Then Drag and drop them in the Terminal window. The path of each file and folder will appear on the Terminal window.
Step 3. Now hit the Enter button, and the Mac will begin to empty the files and folders on the Trash.
![[Solved] Cannot Empty the Trash on Mac](https://www.mobepas.com/images/20220213_6209422ac7d88.jpg)
I am sure that you can empty the Trash on your Mac now.